The Ultimate Camper Truck bed Build on my Tacoma
I’ll walk you through the step-by-step process with photos of me creating the ultimate camping truck bed build for your vehicle so you can get out on the road in no time.
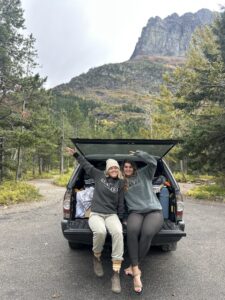
It’s always been a dream of mine to make camping and traveling affordable by cutting down on costs and making the experience easier overall. I decided to build out the bed of my Toyota Tacoma truck to create the ultimate camping vehicle! This is for you if you have an SUV or truck and don’t want to spend your dollars on a fancy nomad vehicle like a Sprinter van. It’s the ultimate project if you do a lot of road trips.
I wanted the set-up and take-down of camp and cooking to be as easy and convenient as possible. That’s why I decided to create a bed platform with drawers underneath for storage and a grill set up for cooking. Between saving on set-up time, having a comfy, dry place to sleep, and making food nearly anywhere, I think it was well worth the investment of a few days of hard work and a little $$.
Some links may contain affiliate links, I may earn a small commission on these but they are never at any extra cost to you!
Materials Needed
Wood
I used plywood for all of it. For the drawers themselves, I used 1/2 inch(other than the door of the drawer), and then for the bed top and frame, I used 3/4 inch. I used about 4 pieces. A few were already scrap pieces, but I am guessing 1 .5 inch and 3 .75 inch.
Accessories & Hardware
- Used wood glue for every step I could.
- Drawer handles
- I used nearly all pocket screws for this project using a pocket hole jig.
- Drawer liner
- cheap thin carpet from Home Depot
- 60″ Drawer slides
- 16″ Drawer slides
- Polyurethane for countertop
- Countertop Hinge springs
Tools
- Chop Saw
- Pocket Hole Jig
- Drill
- Router
- Table Saw
- Oscillating Multi tool saw
- Measuring tape
- Level + Square
- Hole Saw Set
- Stapler
I have a 2014 Toyota Tacoma with a 6-foot bed. It is 48” between the wheel well and 54” wall to wall. A full-size mattress topper fits perfectly on the bed. It’s not really big, but it’s just big enough for two people!
I watched 5-10 different YouTube videos and tutorials on these types of builds and ultimately took a few and made up some of my own needs. Three things I wanted from the build. Lightweight (so no 2×4 boards), Not drilled into the truck at all (removable). Maximum space for sleeping(fully flat on top).
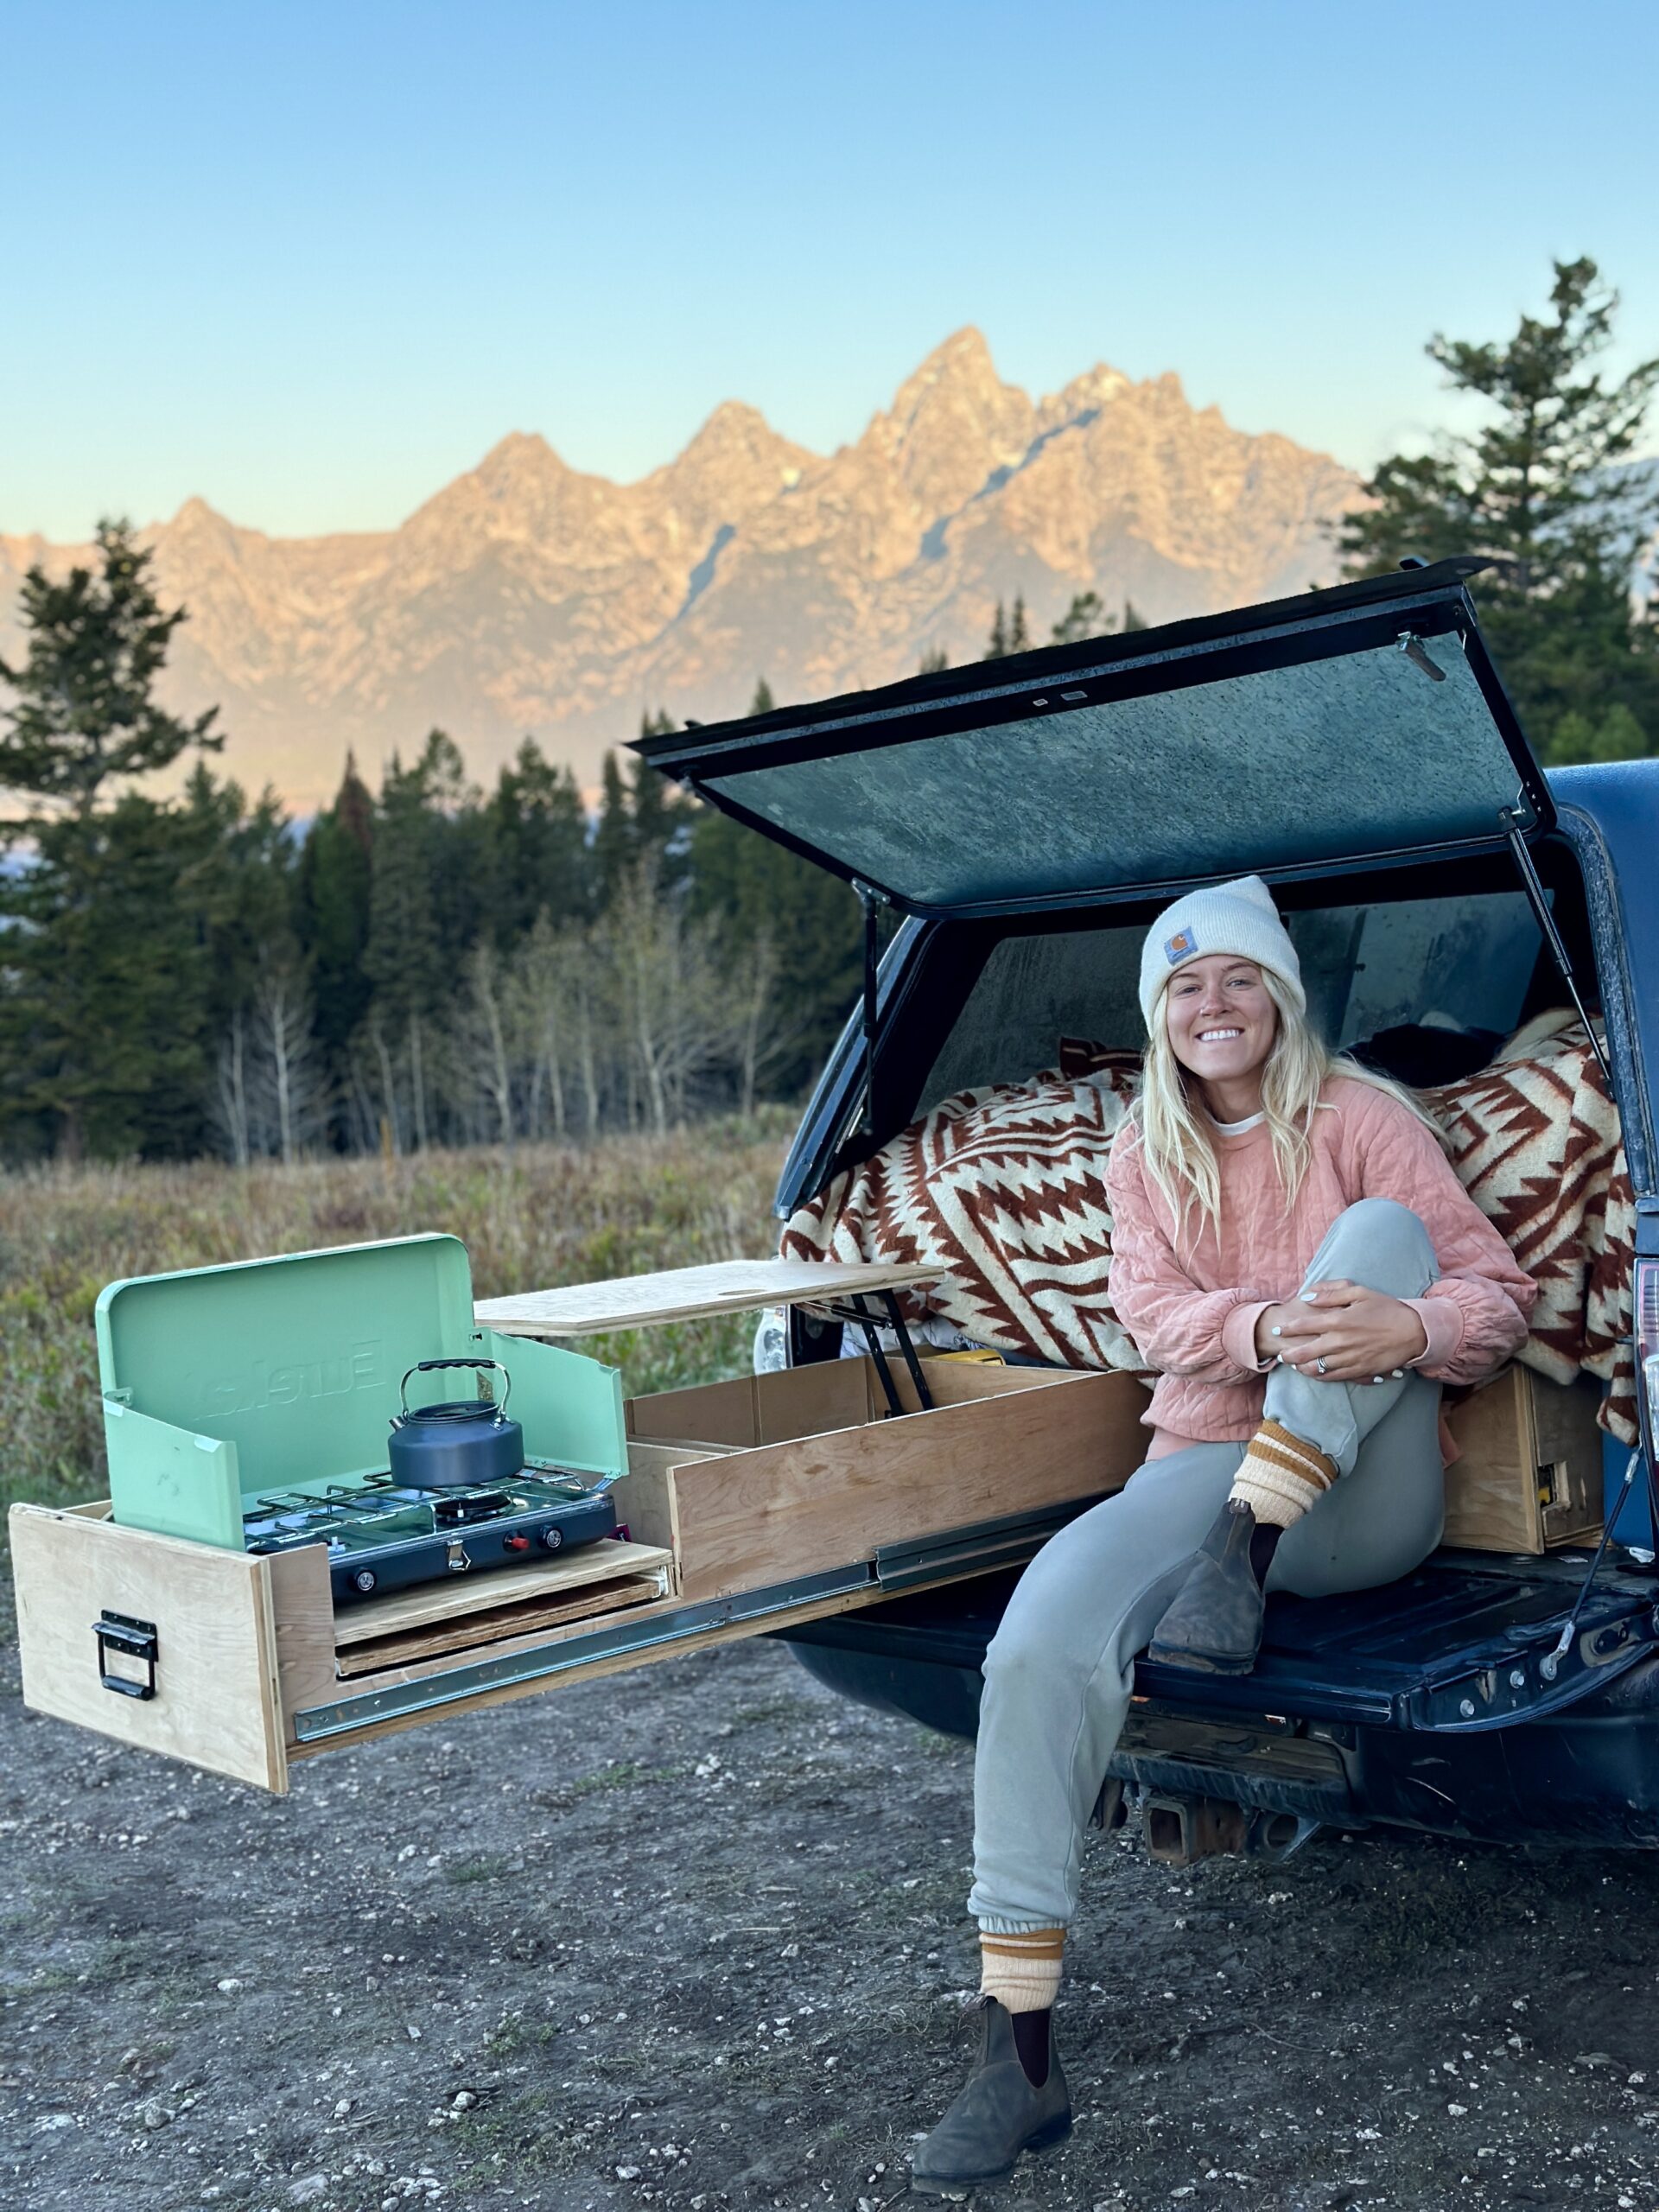
For this build, you will see two drawers, a pull-out cutting board, a pop-up counter top, removable drawer spacers, and the whole build having the option of being removed.
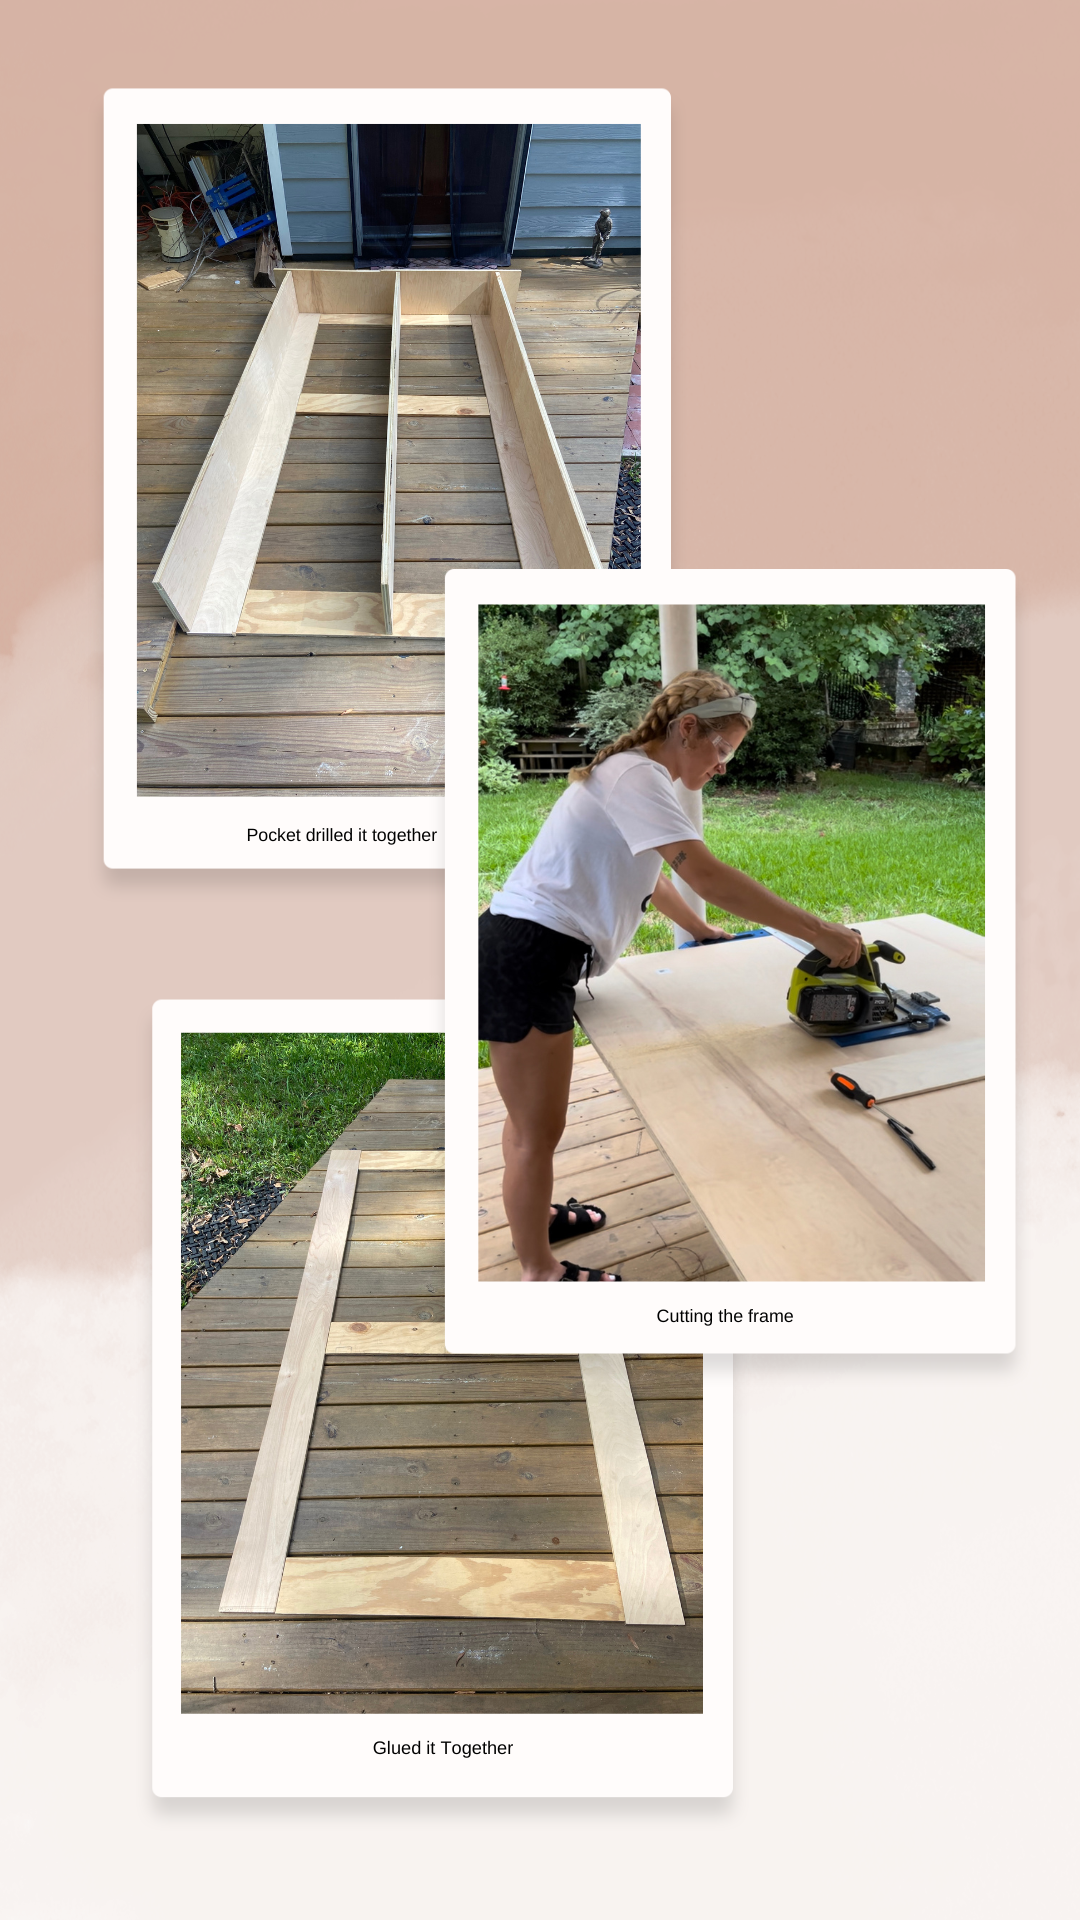
I tried using a circular saw for this project, and it definitely didn’t work. I ended up asking a friend to use their table saw for a few days and cut the rest that way. (you can rent one from Home Depot) It’s important to have straight and squared edges for this project.
As you can see in the top photo, the back frame is wider. This is to go against the back wall so that my corner pockets(which you’ll see later) have something to rest on. This also helps secure it from sliding out from the truck because these would hit the wheel well first.
For the underframe, I wanted maximum airflow and also not super heavy, so I cut it like this and then glued it together with wood glue. Knowing I was going to pocket drill the frame to it and secure it that way I wasn’t too worried about the structure being perfect yet.
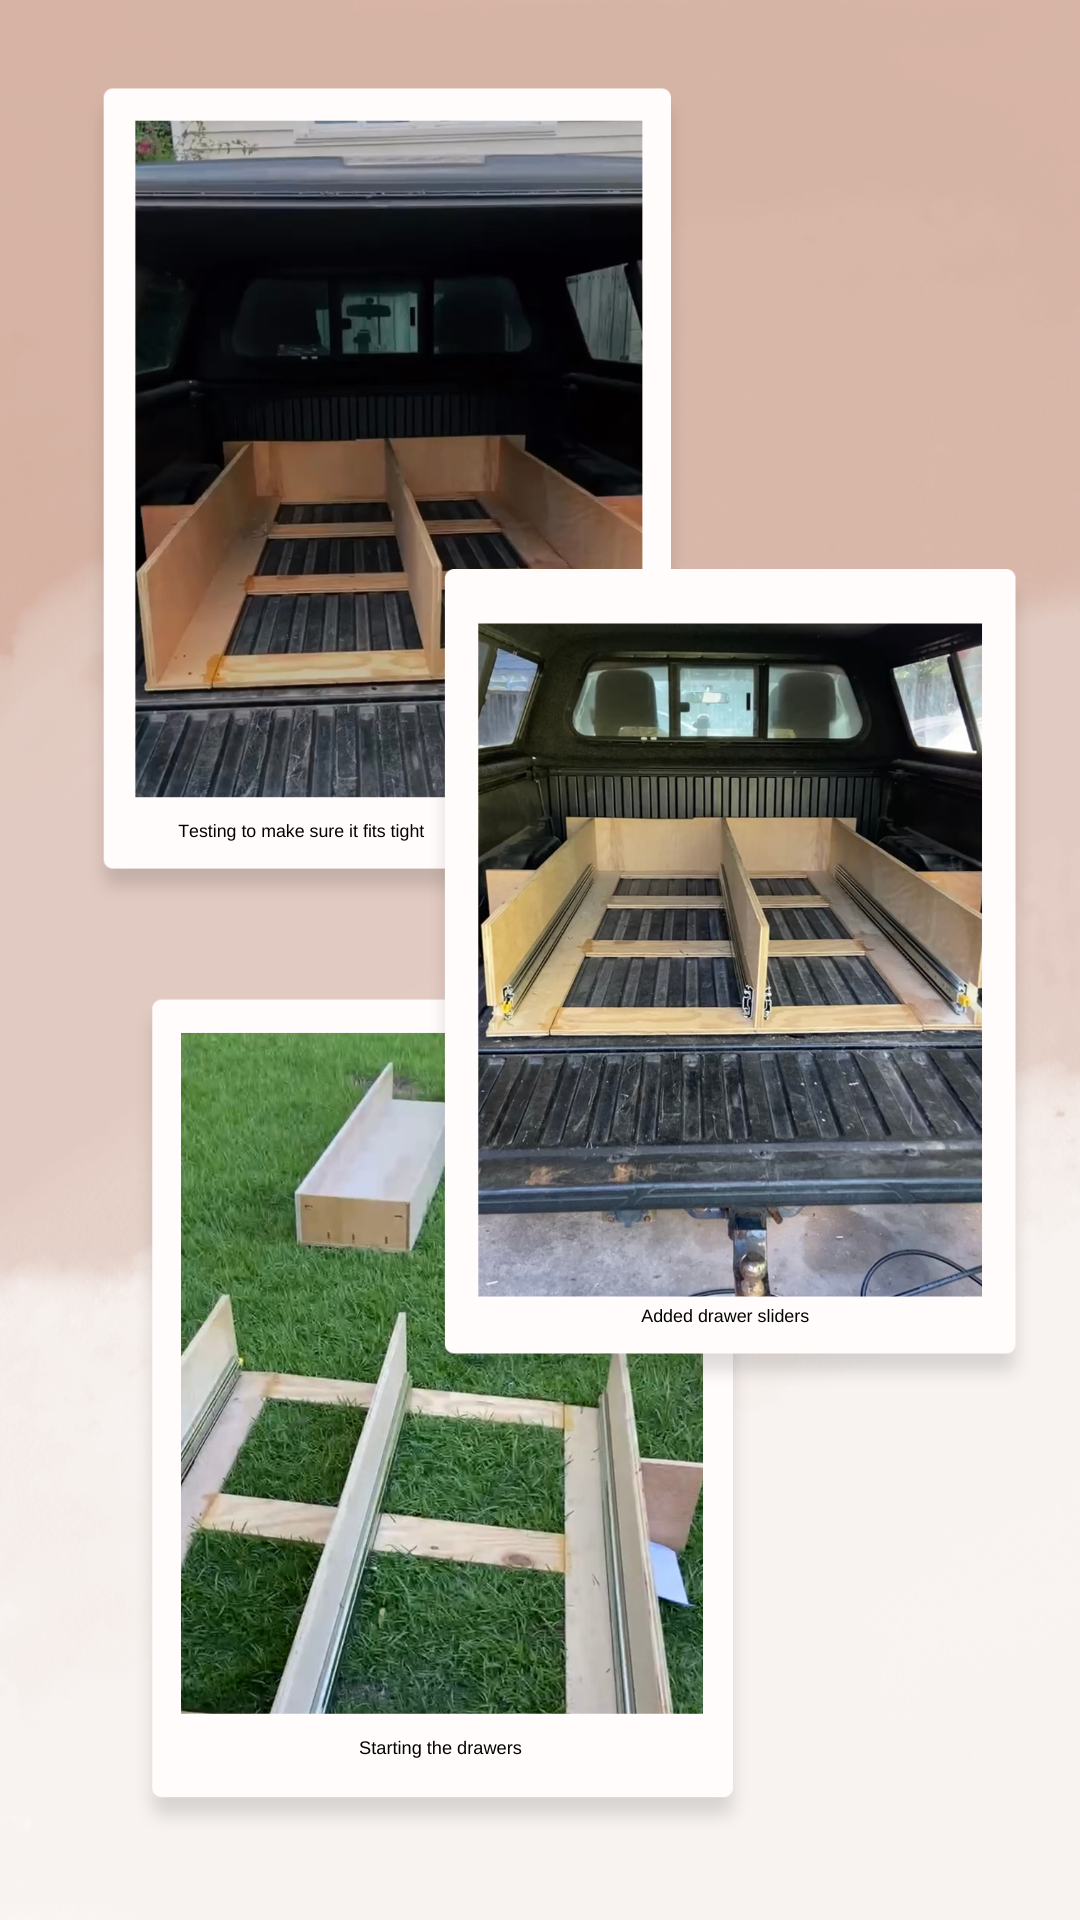
Once the frame was built, I added the drawer sliders, rated for 500 lbs and 60 inches; I placed them about 1-2 inches in from the front of the drawer and about 10 inches from the back of the drawer. Make sure to add all the screws. Later, you’ll see I cut out a square to reach the front unlock for the drawers while the drawers are shut.
This lock is so that if you park on a slope, the drawers aren’t sliding out when the tailgate is down. You really wanna think about getting good drawer sliders or having a stand that kicks out under the end of your drawer when it slides out. After your drawer is full of food and gear, it can get really heavy without the 500lb sliders… I don’t know if a 6-foot drawer would be very secure on its own. I have seen it done on other people’s setup, and it seems fine, but I didn’t wanna risk it.

The Pocket Hole Jig was definitely a necessity, especially because I was using some thin wood. It would have been hard to drill it all together nicely without it. The drawers would have been especially hard to put together nicely. This multi-tool wasn’t a necessity, but it came in handy when I had to cut the drawer slide lock cutouts and for the grill set up. This is mainly cause I did a lot after the drawers were assembled. This was an error on my part to not have that planned before assembly.

Next, we tested the drawers and screwed them onto the sliders on the frame like this. It is super important to leave a gap under the drawers so that it rolls in and out smoothly. I used a 1/8 board but would have used a 1/4 looking back on it now, especially because of the weight in the drawers themselves when loaded. Also I decided I wanted to have drawers with dividers that could be adjusted and taken out. Since I wasn’t sure what would go in each drawer, and camping gear could be all lengths, I didn’t want to commit to a size.
As you can see, I made a little track where our dividers could sit and be taken out at any moment. This was also done after the drawer was built. If you’re doing this, plan ahead, and it will be much easier to get all the way down to the base and not just halfway like mine are, haha.

Finally, with the drawers assembled, I started the top frame. This frame is not screwed in at all, and it is all easily removable pieces. the farthest back piece is as wide is the drawers and bottom frame(46”) and comes in to about where the wheel well starts. Then the next piece is the biggest, it’s 54” and covers on top of the wheel wells fully. The next piece could have been one whole piece, but I didn’t have the right size board available, so I made it into two. This, again, only covers the drawers and sits on the frame exactly.
You can see there are four corners missing. This is because those are spaces for storage(truck stuff like jumper cables, rope, hitch, etc). There, they can still be in the truck but not in the way of anything. We often use the front two gaps for dirty shoes and firewood and were super thankful we left them open like that.
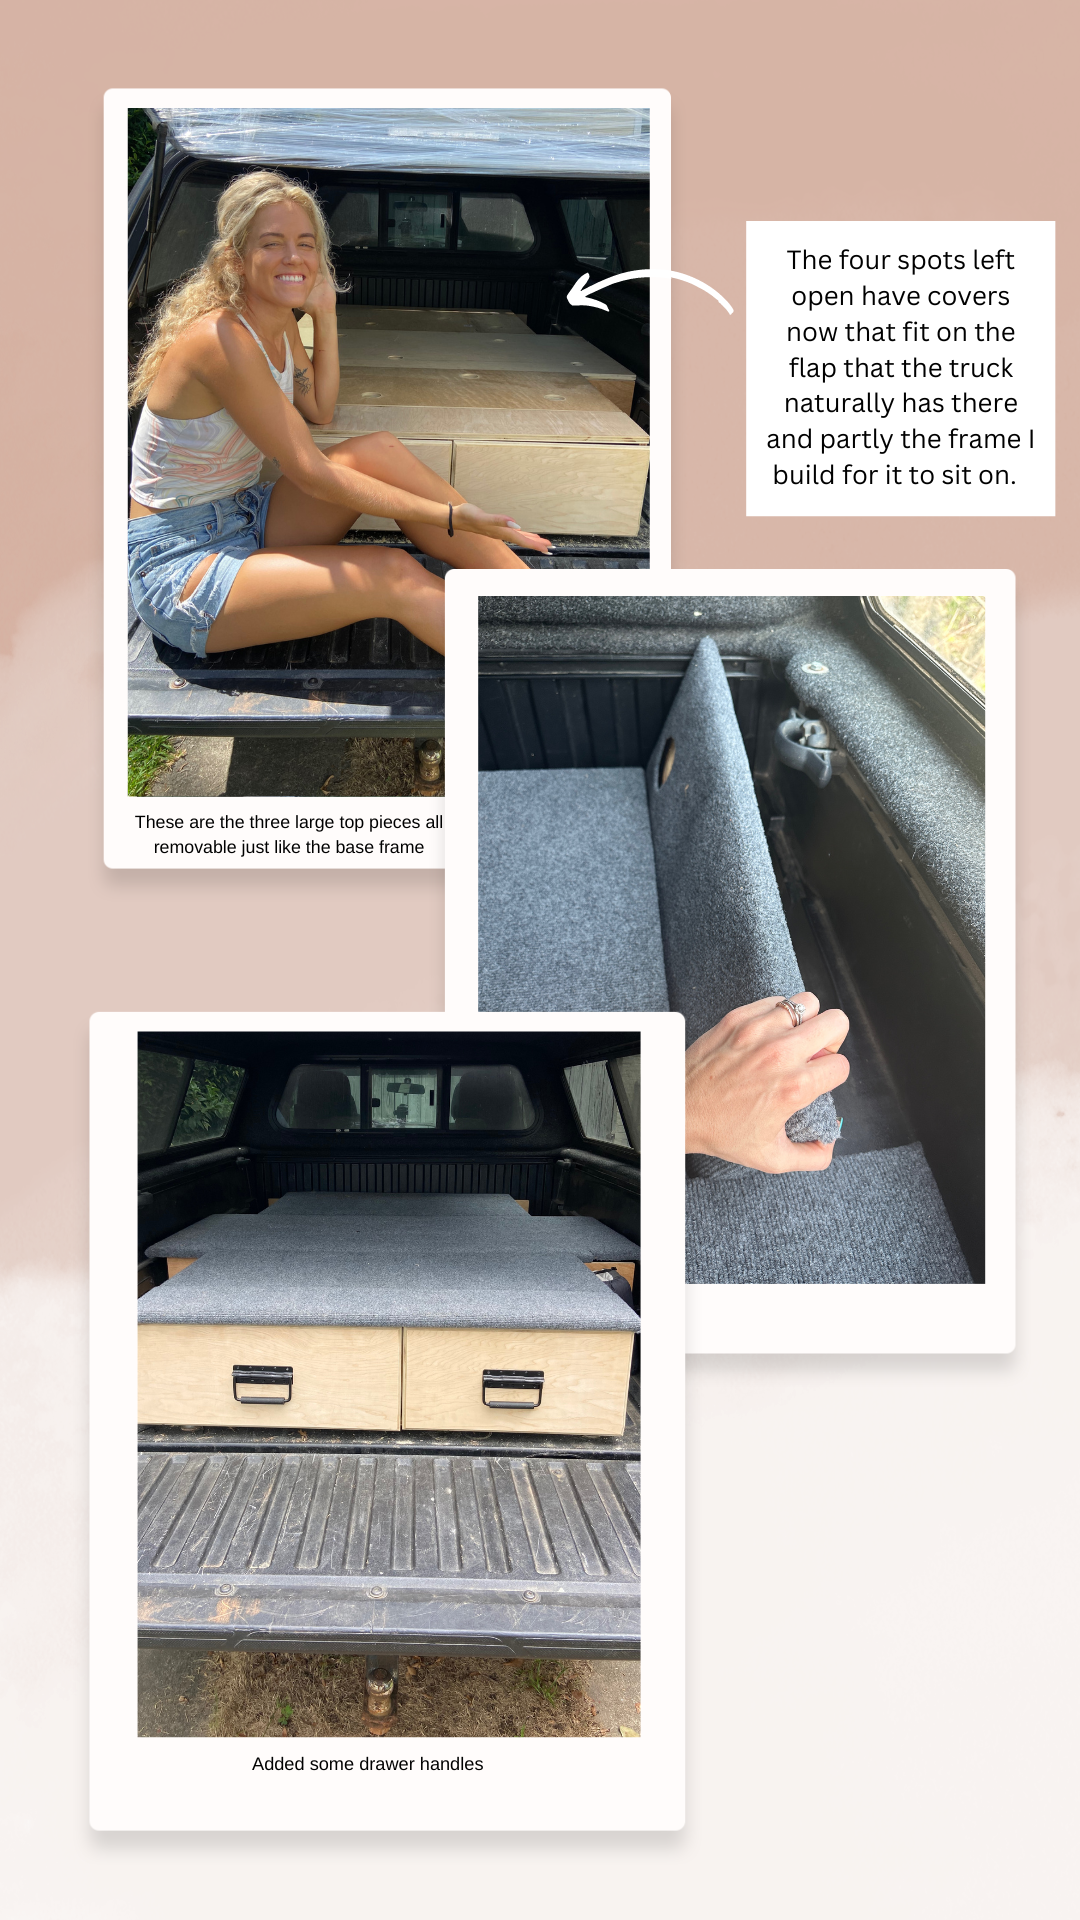
I added a grab hole. That way, it’s easy to lift the back corners. I also added two sturdy handles to pull the drawers in and out.

This last step was absolutely my favorite. After a few weeks of having the bed made, I decided to customize it a little more. I wanted a space for my grill to sit and be used at all times, I wanted extra counter space and a pull out cutting board. Yes, this seems extra, but it was the coolest part to figure out. As it was before, my grill would sit way too far in the for me to use it as easily as I wanted to, and I wanted it to be able to sit in the drawer while I cooked. So I created a shelf, and then under that shelf, I left a gap to add these sliders before attaching it to the drawer itself. You can see in the photo below how it turned out. Now I can keep that grill in there at all time and use it immediately.
For the pop-up counter space, this was only hard to get level and screw it on perfectly. But I’m so thankful I didn’t give up after many redos. Now, it sits down flush with the drawer, but I can also pull it up for a nice-level coffee bar, which makes camping dreamy.
Two things to note:
- Polyurethane or seal where you can. This keeps water from ruining the wood and makes the surface washable if it gets dirty. I sealed the counter and cutting board. I am planning on coating more of the exposed wood itself because there’s so much humidity, and I don’t want the boards rotting.
- Line the drawers with some sort of liner. This is a normal cupboard liner and has been super helpful in keeping the drawers clean and nice when things spill.

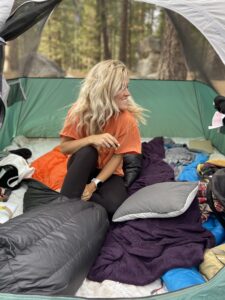
Removable drawer dividers* I am so thankful to finally have made this bed set up because it doesn’t take us nearly any time to set up and take down camp. This saves us so much money just knowing we have an easy setup to make food, and it’s not a huge process while we’re starving, and it’s a super comfy place to sleep. We have a 4-inch full mattress topper in there, and it’s comfier than our bed at home. Luno has great camping pads as well that could fit two in this space!
3 Years later…Tips on what I would change:
I would have planned every aspect in detail before assembling it, I definitely ran into issues doing it backward. Also, I would have used a table saw for the whole thing, starting with a circular saw messed some of the beginning cuts pretty badly. We should have created a bigger gap between the drawer and the bottom frame(it’s barely enough room to slide in and out rn). I would also make sure to add every screw possible for the sliders because once assembled onto the drawer it can’t separate. I have had 2 screws pop out in the back and cannot disassemble the drawer from the frame to re-add the screws into the holes.
Also looking back, I would have sealed all the front areas with polyurethane before assembling, they are exposed to water a lot and I’m worried it could mold. and lastly I probably would have only made one drawer with adjustable dividers and then left the other one with dividers screwed into place.
I hope this inspired some sort of camp setup build for your vehicle! feel free to watch this video of the bed for more details. Or head over to my other blog on saving money and making the most on weekend adventures!
Some links may contain affiliate links, I may earn a small commission on these links they are never at any extra cost to you!